|
[?]Subscribe To This Site
|
|
If you are really serious about getting the most out of your dreams and of becoming efficient at dream analysis then I cannot stress enough the importance of keeping a journal.
Sure you could just write your dreams down on scrap bits of paper, but I can assure you from experience that those little bits of scrap paper get lost and are not exactly inspiring to work with.
Not only does writing your dreams down help you to organise your dream records it also aids in committing your dreams to memory. And by paying attention to your dreams and by writing them down on a regular basis you will naturally remember your dreams more often.
So let's get down to it!
I am going to show you how easy it is to make your own journal!
That's right!
Because making one is so much more fun than just buying one.
Tips and Techniques for Creating your own Dream Journal
You could use any old writing book or any old pages you have lying around, but I have found the most rewarding and expressive way is to create your own dream journal by hand.
Making a journal will get you excited about writing your dreams down, giving you that little bit of extra motivation that you probable need at this point!br>
Try to look at this whole experience from creating your journal to writing and drawing within its pages as a creative project.
And the end product is something that you can be proud of and keep forever.
There are several ways to create a simple journal; I am going to go through four different ways of making a bound journal.
For each of these techniques I have designed some internal pages for you that you can download.
This makes your whole dream journal and analysis experience a lot easier and enjoyable, which means that you are more likely to start analysing right away…which is the goal right?
Spiral Bound Journal
Materials:
Whatever colour and design of paper you want for the pages of the bookA hard cardboard cover for front and back.
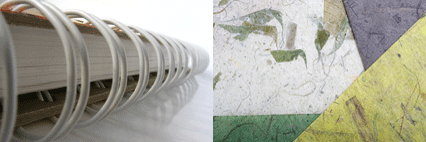
Creating your own spiral bound dream journal can actually work out to be less expensive than buying a pre-made book.
And making your own has the added bonus of allowing you to be free to create exactly the look that you are after!
You can add unique elements to your book like different coloured pages or computer designed pages like the ones you can download from this site.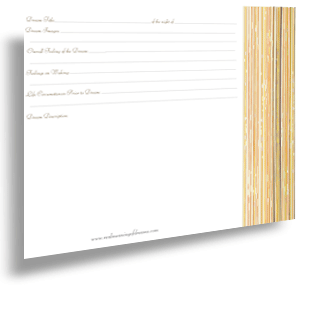
Download the pre-designed spiral bound journal page by clicking the image to the right.
Steps:
1. collect all the pages that you want for your spiral bound book in the order you want them to be bound and hold them together with a binder clip, until you are ready to bind.
Generally 1” thick is a good guide to follow. Most binders will be able to go that wide. You could use heavy card stock for the front and the back covers if you like.
2. locate a service centre that handles spiral binding. Most copy centres can provide this service. This is not a complicated procedure and generally the centre can bind your book while you wait so your whole journal can be created in a single afternoon!

Single Signature Journal
Materials:
Paper, ruler, pencil, scissors, papers, needle, thread or stapler, binder clip, knife, cutting mat.
Download the pre-designed signature cover and inside pages by clicking the image to the right.
A single signature or pamphlet book is simply a group pf pages that are folded in half and sewn or stapled along the centre.
For a single signature book use 3-8 sheets of lightweight paper. Any more than this and your journal will gape when closed.
If you have a lot of sheets you can trim the pages after binding in order for them to look neat and sit right behind the covers.
Steps:
1. Fold the pages in half
2. Place the pages one on top of each other, making sure they are aligned.
3. Bind the pages with the binder clip to hold them in place.
4. If you are stapling:
Measure half of a page along the spine and then mark the spine in quarters. At each of the quarter marks is where your two staples will go.
When stapling place your pages over something soft like carpet or foam core is good. You need something that the staples will sink into and not bend.Staple your pages and covers together.
Trim any excess pages that are hanging outside of the covers.
If you are sewing:
Poke three holes in the folds or spine of the pages, evenly placed, and leaving about an inch from each of the ends.
One of the simplest ways you could sew your pages is as follows:
• Start with the middle hole
• Go back out to one end hole
• Skip the middle and make a long stitch to the other end hole
• Come back through the middle and tie a square knot around the long stitch.
The whole thing should look like two long stitches.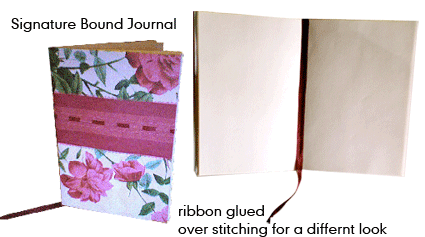
Re-Binding a Bought Book
If you did not want to create a signature journal from scratch you could find a pre-made one that you like and you can make it more personal and attractive by using this re-binding process.
Materials:
Bought single signature book, an exercise book will work, some decorative paper for the cover.
N.B.(I used an old gift back from hallmark that I had lying around the house for the cover of the example. It is just right for a cover because it is thicker than regular paper and has a glossy finish, which will make the finished product a little more special) glue, staples or needle and thread.
Steps:
1. You will have to remove the pre-existing binding either sewn or stapled. Add your new pages at the correct size and arrange the book the way you want it to look. Add a new cover if you so wish.
2. Once you have all your new pages in place using a needle and thread sew the same way as we described above, or staples if you this is easier.
Sewing has always been easier for me as you can use a needle to punch new holes into the pages that correspond to the holes already there. Tightly tie the ends of the thread together inside the signature in the centre of the book and your new dream journal is ready!
3. On the example shown I used a red ribbon to hide the stitching which I glued on the middle page and left a small part hanging out of the book to give it a more sophisticated feel.
Ledger Style Tie Journal
This attractive journal can be made at any size you wish however for this example we are basing the size on an 11” x 9" dream journal.
Materials:
hard cardboard: 2 x 9¼” x 8” and 2 x 1½” x 8” sizes
Decorative paper either hand drawn or bought paper, or the pre-designed templates you have downloaded from this site at 12” x 9” in size
Glue, ruler, pencil, cutting boardInterior covers of whatever designs you wish at 10½” x 7½”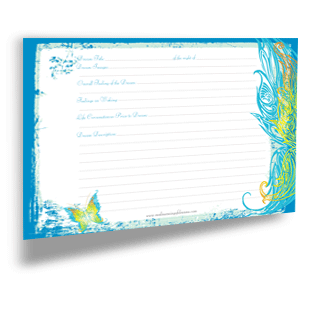
Download the pre-designed ledger covers and inside pages by clicking the image to the right.
Steps:
1. Place one of the 9¼” x 8” size pieces of cardboard and one of the 1½” x 8” pieces ¼” apart on the decorative paper and glue them down. Make sure your decorative paper is the right side down so you have the decoration on the front. The ¼” is so the cover and the back cover can flip open.
2. Do the same with the other two pieces of cardboard.
3. Miter the corners and glue all sides down. Do this to both the front and the back covers.
Side Note
Mitering is a technique used to get clean corners when book binding.
Take a look at the diagram below for a brief demonstration of how to achieve mitered edges.

4. Once this is done get the two inside covers and glue them down to each of your front and backboards.
5. Cut two holes on the front and back covers and chose some nice tie that matches your cover design.
6. Cut several sheets of paper or use the downloadable page design here. All you will have to do is cut them down to size.
7. Punch holes in the paper corresponding to where the holes appear on the front cover.
8. Thread the tie through all the holes and tie at the front.
9. Embellish the front cover design if you so wish and voila! Your new dream journal is ready to use!

Return from Dream Journaling to Dream Interpretation


